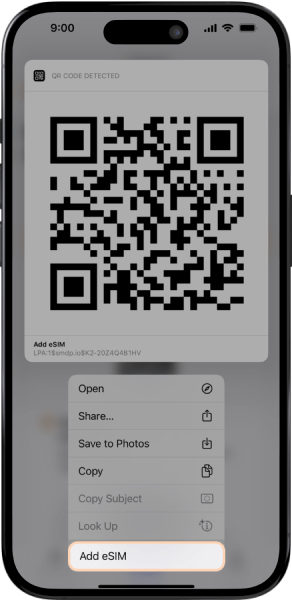
Use Haptic Touch or your Camera
- Hard press on the QR code and tap on "Add eSIM" option in the list. (*works only in Safari on iOS devices).
- Alternatively, scan the QR code with your camera.
- QR code can be found in the email or the installation guide, which is provided after your purchase.
2
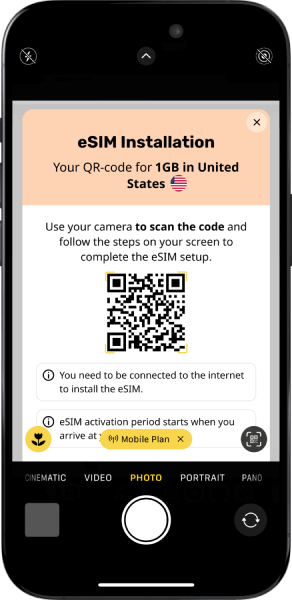
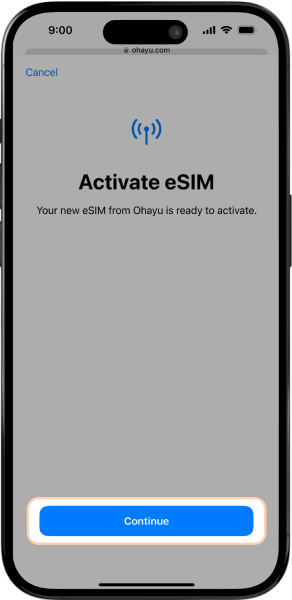
Install your eSIM
Follow on-screen instructions to install your eSIM.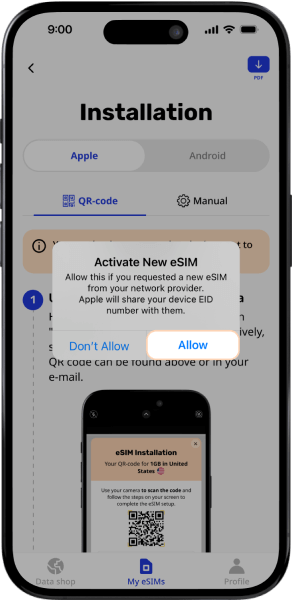

3
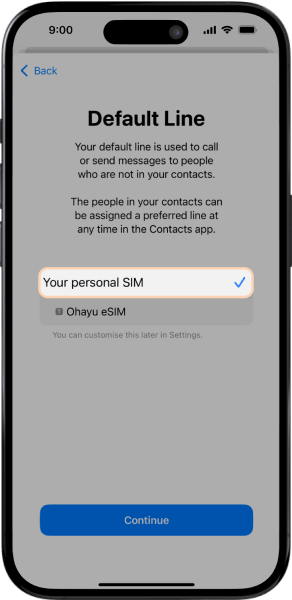
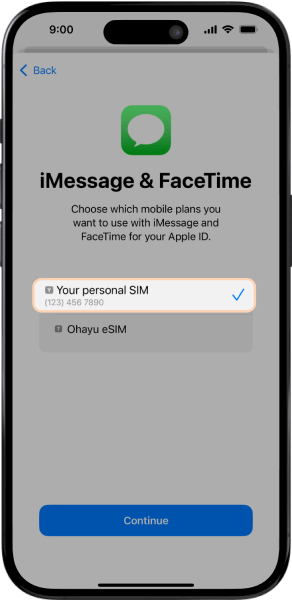
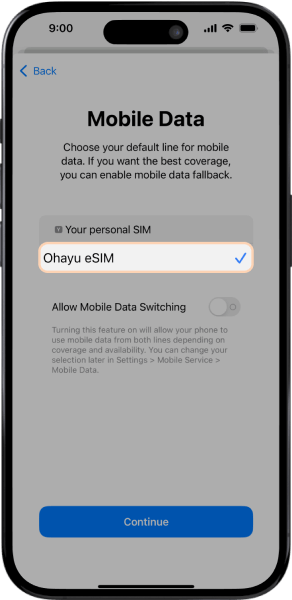
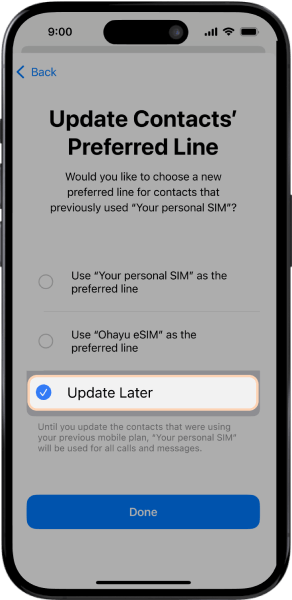
Complete installation
- Select your personal SIM as your Default line for calls and sms.
- Select your personal SIM for iMessages & FaceTime.
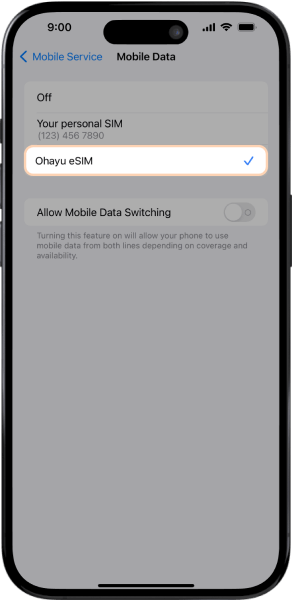
- Select your new eSIM as the source for "Mobile Data".
- Click "Update later" for the preferred line.
4
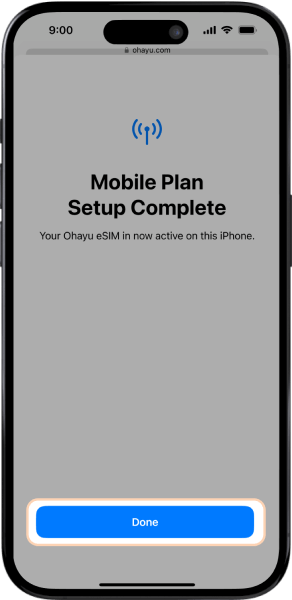
Confirm successful installation
If eSIM is installed successfully, you will see it in your "SIMs" list in "Mobile Service" ("Mobile Data" for iOS 16 and earlier versions) with the line turned "On".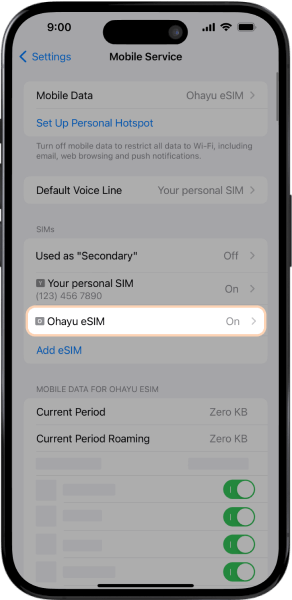
Activation
The following steps should be done once you arrive at your destination, to ensure your eSIM's validity starts correctly.
1
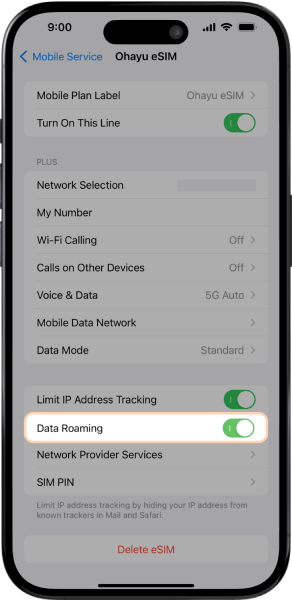
Enable Data Roaming
- Tap on your newly added eSIM plan in the "Mobile Service" ("Mobile Data" for iOS 16 and earlier versions).
- And turn on "Data Roaming" with the help of the toggle.
2
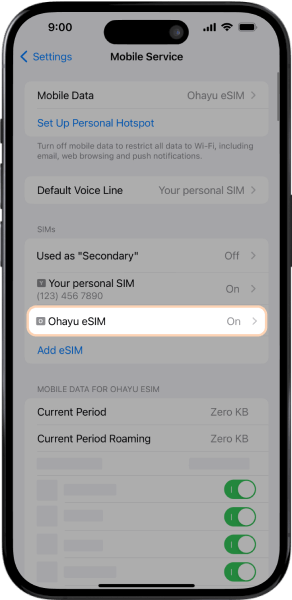
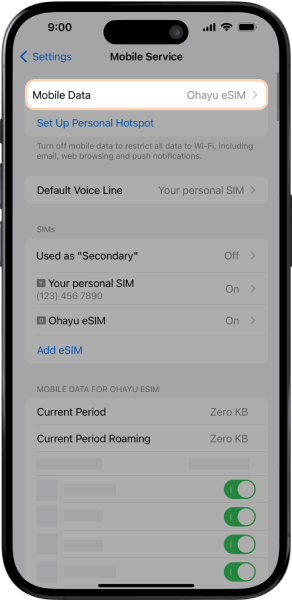
Make sure eSIM is a preferred data plan
- Go back to "Mobile Service" and then go to "Mobile Data".
- Click on your newly installed eSIM plan to use it as a source of internet data.
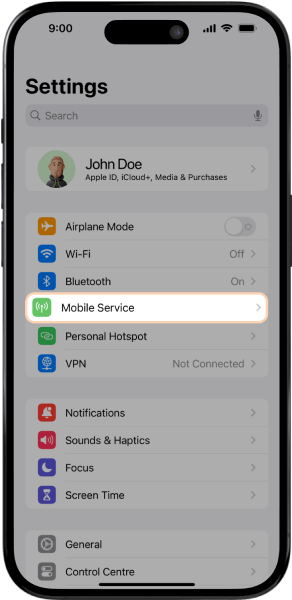
Navigate to Mobile Service
In your Settings, tap on "Mobile Service" ("Mobile Data" for iOS 16 and earlier versions).2
Add eSIM
Tap on "Add eSIM" ("Add Data Plan" for iOS 16 and earlier versions).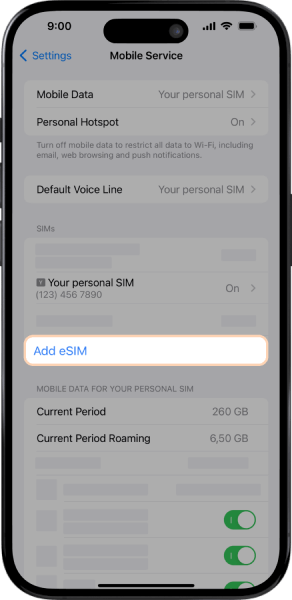
3
Use QR Code
Tap on "Use QR Code" (this will lead to screen with manual installation option).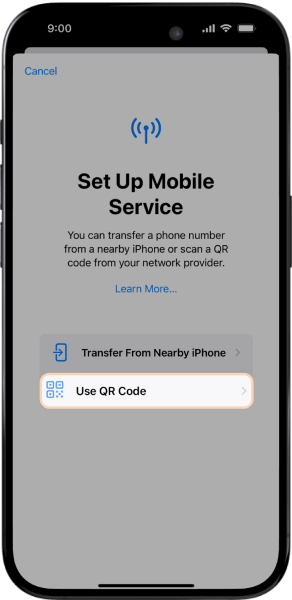
4
Enter Details Manually
Tap on "Enter Details Manually".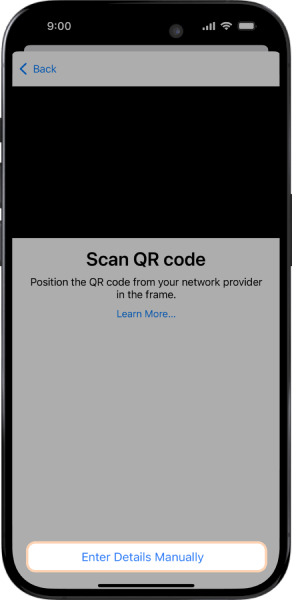
5
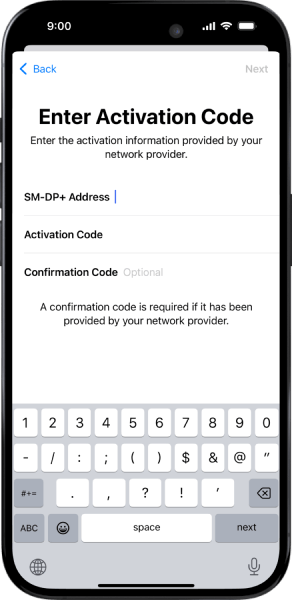
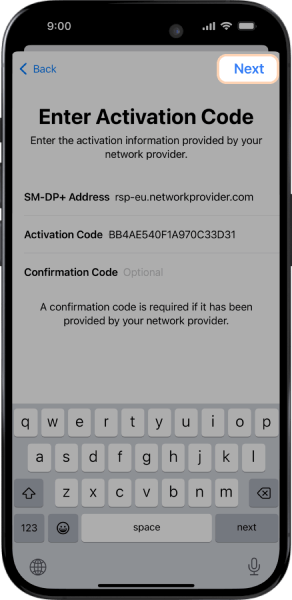
Enter SM-DP+ Address
- Enter the SM-DP+ address in the corresponding fields and click "Next" to finish set-up.
- The activation code can be found in the installation guide, which is provided after your purchase.
6
Install your eSIM
Follow on-screen instructions to install your eSIM.
7
Complete installation
- Select your personal SIM as your Default line for calls and sms.
- Select your personal SIM for iMessages & FaceTime.
- Select your new eSIM as the source for "Mobile Data".
- Click "Update later" for the preferred line.
8
Confirm successful installation
If eSIM is installed successfully, you will see it in your "SIMs" list in "Mobile Service" ("Mobile Data" for iOS 16 and earlier versions) with the line turned "On".Activation
The following steps should be done once you arrive at your destination, to ensure your eSIM's validity starts correctly.
1
Enable Data Roaming
- Tap on your newly added eSIM plan in the "Mobile Service" ("Mobile Data" for iOS 16 and earlier versions).
- And turn on "Data Roaming" with the help of the toggle.
2
Make sure eSIM is a preferred data plan
- Go back to "Mobile Service" and then go to "Mobile Data".
- Click on your newly installed eSIM plan to use it as a source of internet data.